Good document control is essential for any efficient drawing office. It allows engineers and drafters to record, print, and transmit drawings in an organized and professional manner. Key components include an effective revision control system and a well-designed drawing title block, which not only provide clear and accurate information but also serve as free brand advertising to clients and suppliers.
Drawing Central links drawings to their specific drawing registers and automates the updating of CAD drawing title blocks. This feature saves drafters time and effort, especially when dealing with large batches of drawings. This program enhances productivity in both large and small drawing offices. Additionally, the configuration options allow the setup of multiple project-based drawing and information systems for drafters and project engineers across various disciplines.
Microsoft Office Excel is required to provide a database platform for your drawing registers. Excel is ideal for creating a drawing numbering system and associated data. The "copy down" feature saves typing and promotes consistency in wording and revisions. Drawing Central supports *.xlsm files, which retain formatting and macros, eliminating the need for *.csv files and ensuring that all drawing data is centralized.
To help speed up the implementation of this document control system, a folder containing example drawings is created in the %UserProfile%\Drawing Central\ directory when first loaded. These examples match the "drawing number" format discussed below. It is recommended to open these drawings before reading that section and trying the examples.
Currently, only Autodesk products such as AutoCAD, Inventor, and Revit are compatible with this application. However, they all can reference the same centralized drawing register and work together within a specific project office environment.
--------------- | --------------
The title blocks are completely standard for the CAD software used, and you will need to refer to the appropriate help files to create templates for your own office. Along with the company or project logo, include parameters for all the drawing information you want to display. Wording is important too, as it is what users will see and interpret in your version of a drawing register. You can save time by customizing the examples provided.
Drawing Central is configurable, allowing you to have as many different title blocks as you need for your different drafting disciplines or projects.
Beware of using a drawing file from an unknown source. It may have been imported, created from another CAD package, or use proxy objects. These can cause compatibility issues for Drawing Central. It is best to create your title blocks from scratch using the base version of the CAD software.
The drawing registers use standard Excel workbooks. Drawing Central does not need any Excel macros to function. You can configure the workbook as you like, except for a few simple rules noted below. The example "data entry" sheet has blue columns containing formulas added to help with functionality. Several drawing reporting sheets and macros have also been included as examples of what can be done to make the register even more useful.
If your projects are similar, why not use a previous register as a template? Just rename the file and drawing numbers. This is a good way to maintain consistency between projects within the drawing office. You can pre-fill your register and then update descriptions as and when your drawings are created.
When making changes in your drawing register, use "clear contents" where possible, and take care that your "cut + paste" does not contain any formulas (shown as blue in the example). A good way to maintain your register is to always leave the top line untouched. Then, if you have problems, you can always "copy" down to repair the formulas.
Once properly configured Drawing Central is very quick and easy to use. However there is a bit of preparation work to design a drawing numbering system, title block, data layout, drawing register, and user training. The drawing and excel register combinations "as supplied" with Drawing Central are working examples from which you can make a good start.

Drawing Central needs the following conditions to operate:
1. A desire to track and report on all drawing data and revisions.Drawing Central transfers data between a standard Excel drawing register and multiple standard CAD title blocks. Having only a few rules to follow allows maximum control of your information and how it is displayed.
Rule 1: The full Drawing Number must be listed in column A (the far left) of your drawing register.
This is where Drawing Central searches when looking for a match. Once found, the column headers are searched for title block parameter names. If found, the data will be revised, but only if required.
Rule 2: The spelling of your column headers must match the title block parameter names exactly.
Makes sense but bear it in mind when debugging your register. Note: AutoCAD users have the option to use either the Tag or Prompt text as viable Excel header names. Prompt text allows for spaces and reads better in your drawing register. Back to Top
The Drawing Central menu button will only appear in the CAD toolbar when a "drawing" has been loaded. Depending on the CAD version, you may need to look in the "Add-Ins" tab. The front page of the dialog box is designed for quick access to the two main commands. They utilize the drawing's saved link to quickly load the appropriate drawing register or update the current drawing.
If you have any trouble loading Drawing Central, please refer to Installation for specific help.
Go to the Configuration tab and highlight an example project. Here you can view data and make changes to suit your requirements. Save your new configuration file in a "central" location for all team members to find.
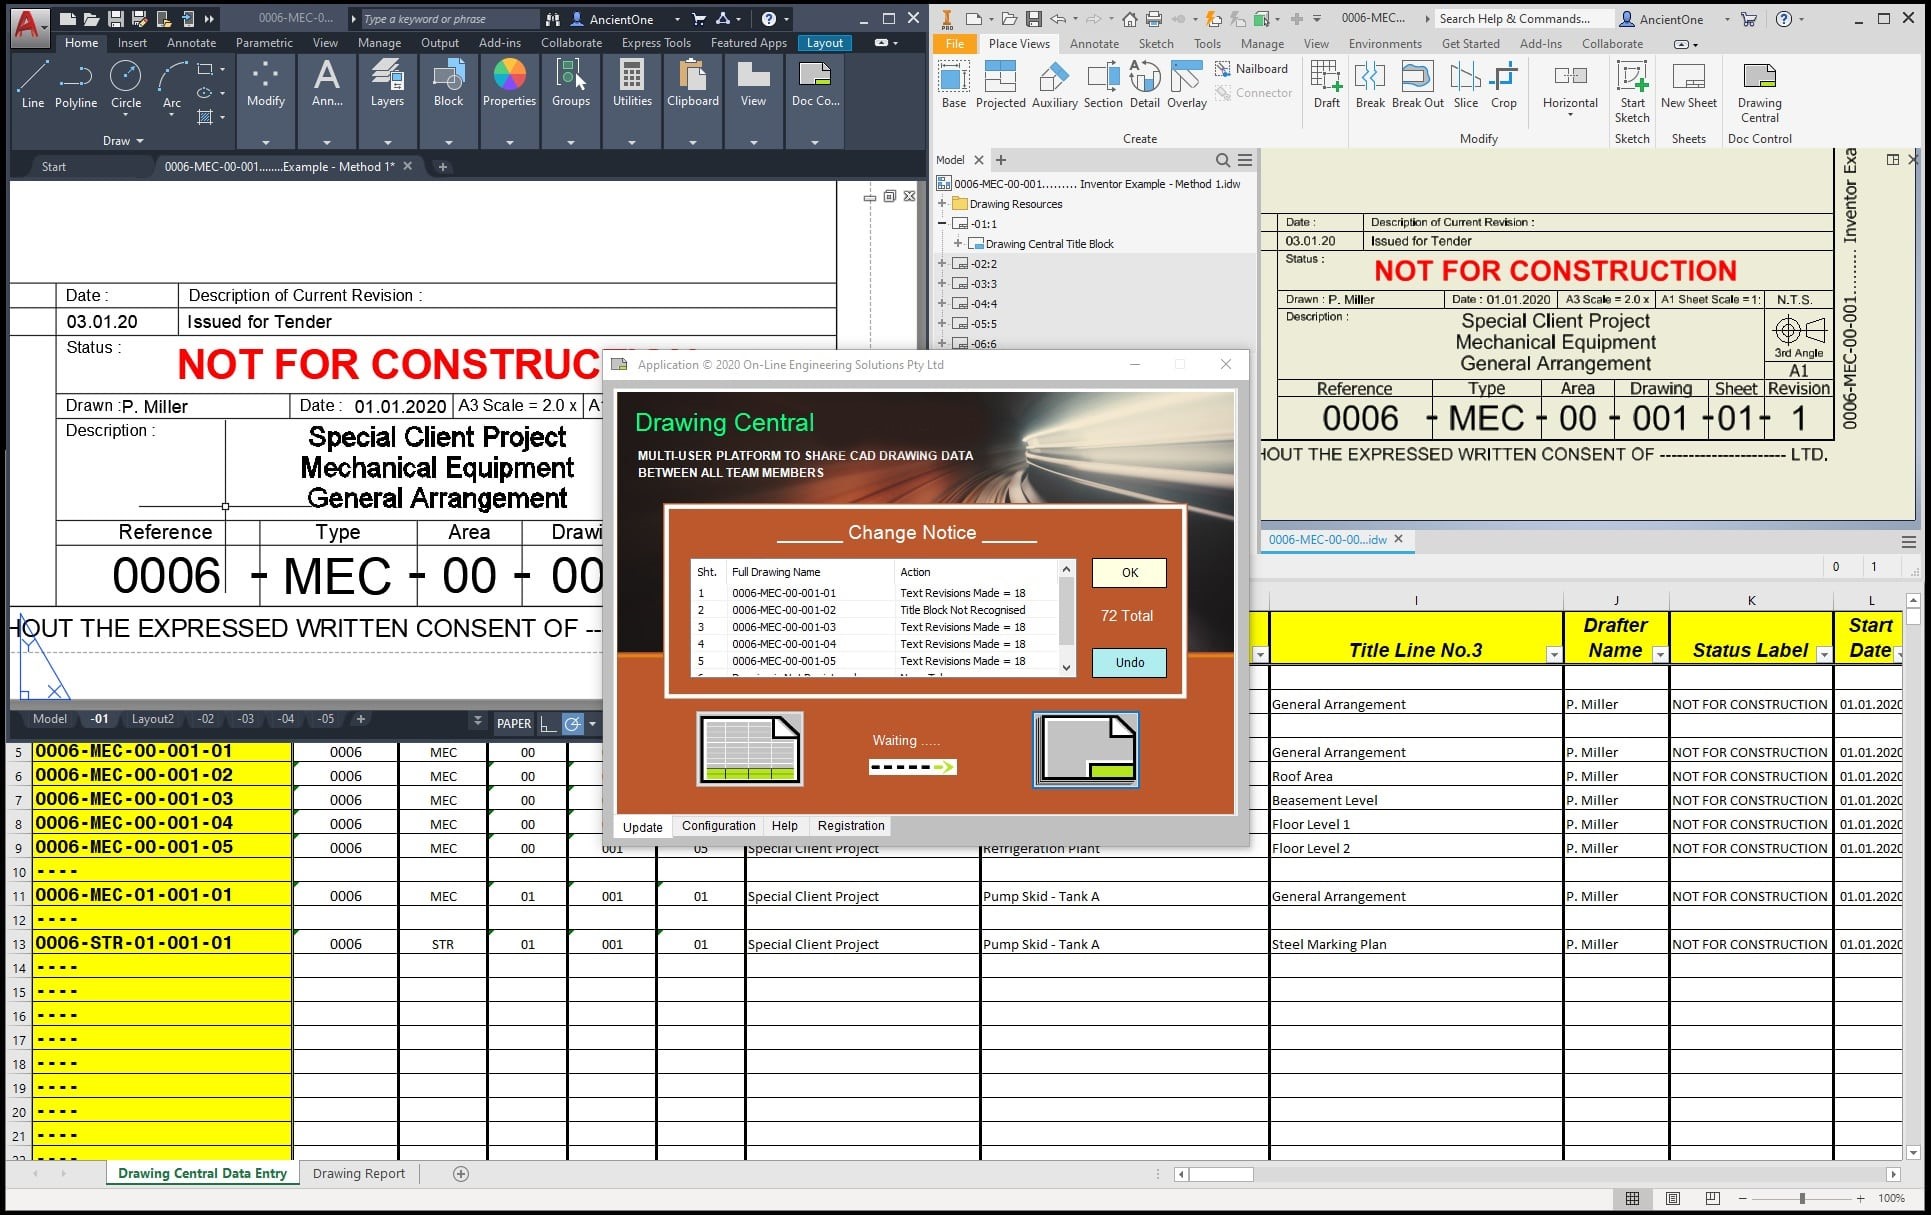
Once all the setup work is complete, operating Drawing Central is very simple. To start, open the example drawing "0006-MEC-00-001......... CAD??? Example - Method 1.???" (replace "???" as appropriate for your current CAD version) and then click the Drawing Central icon to bring up the dialog.
Here you can either open the Drawing Register, if any revisions are required, or you can Update Sheets and get a report on all the changes applicable to the current drawing. Finally, click the "OK" button to go ahead and make those changes. You can also configure your project to automatically update all drawings upon opening and keep the team on track.
Single users are free to save their files anywhere and on any drive. However, Drawing Central has a Multi-User option that allows other team members to access a central path to your project. For this to work, no matter where the drawings are located, the configuration and drawing register files must reside in a common (shared) directory structure. For example: "C:\Users\You\OneDrive\Company Name\Project\Drawings\...".
This is the quickest way to get to your drawing register and make any data changes. It is very convenient to open a drawing and then automatically load the associated register. Drawing Central allows this between multiple CAD programs, drawings, disciplines, and projects. To quickly implement those changes, click the Update Sheets button and then wait for the report. To avoid a "lockup," allow a few seconds for files to sync before proceeding.
If you don't close the Drawing Register first, you will get an Error level 3 message (see below). You may also need to save the register to ensure that syncing has begun and the information is "updated" for all users.
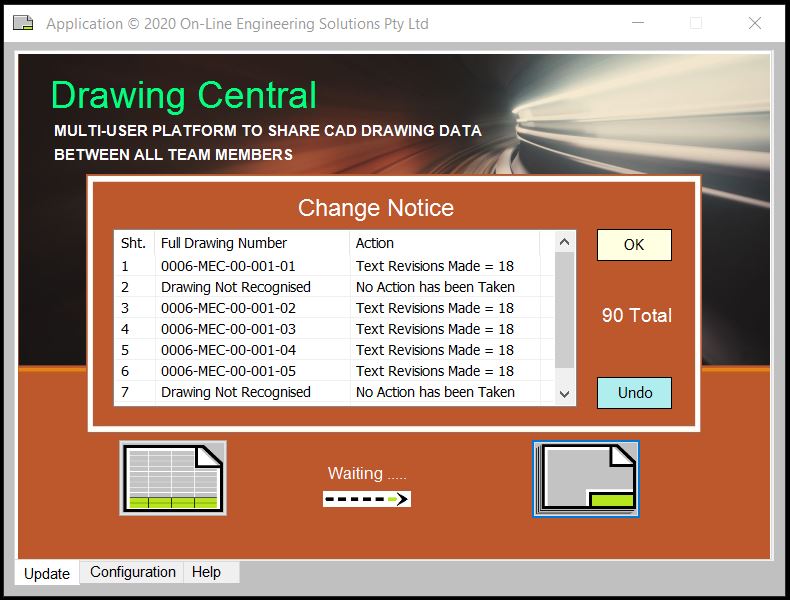
Drawing Central will first check the configuration for any errors, then start indexing through all drawing sheets. As the correct drawing numbers are found, all associated title block text will have its data changed as required. A dialog box will come up and report all these changes and report any errors found on the way. You are given a choice "OK" to keep them or "Undo" to abort and go back to the previous page. Job done!
Finding the correct drawing number (e.g., 0006-MEC-00-001-01) is critical to the automatic operation of Drawing Central. You are free to create your own numbering system, but to be consistent with the examples given, please use the following drawing "%UserProfile%\Drawing Central\???\.0006-MEC-00-001......... CAD??? Example - Method 1.???" (replace ??? with CAD version).
Three methods to recognize the number have been created to give the user some implementation options.
The first (and preferred) method combines the two below to give the best utility. Consider your drawing number as being broken into two parts. The first will be the file or "drawing" name (e.g., "0006-MEC-00-001"), while the second is the indexed or "sheet" name (e.g., "-01"). Drawing Central will index through sheet names and add them to the file name to create the full drawing number text for recognition. It also works better as a template file as you only need to name the initial drawing file once, and then all sub-sheets can stay as "-01, -02, -03 ...".
The second method is to name each sheet "tab" with the desired drawing number. Drawing Central will search each sheet and compare names with the drawing register. Only when a match is found will that sheet be revised. This is reliable, but even if you use a template, you still need to type the full drawing number each time.
The third method is the simplest and only involves naming the drawing file itself. Drawing Central will look at the file name (without extension) and assume that to be the drawing number for changing. The first sheet and all subsequent sheets will be updated using the same data. The downside of this method is that only one sheet data set per drawing can be changed at a time.
But wait, there’s more. When searching a directory for a drawing, it can be difficult to remember the context or contents of a drawing based purely on its digital number code. Drawing Central allows comments to be added to File names and Sheet names very easily and still be recognizable by the 3 methods above.
Just prefix your comments with 3 dots, and all the remaining text is ignored. Basically, the comments are removed to give a cleaned-up version for the search. For example:
File Name: "0006-MEC-00-001...Mechanical Plant.???" and Sheet Name: "-01...General Arrangement" giving you a Final Drawing Number: "0006-MEC-00-001-01". Back to Top
Drawing Central is designed to easily maintain customized project setups or configuration files. Users can nominate the project name, drawing title block, drawing register, and other options on a project-by-project basis.
If you are having problems accessing files over various "online" storage programs, try the Multi-User option. It has been included to successfully navigate the likes of Dropbox and OneDrive.
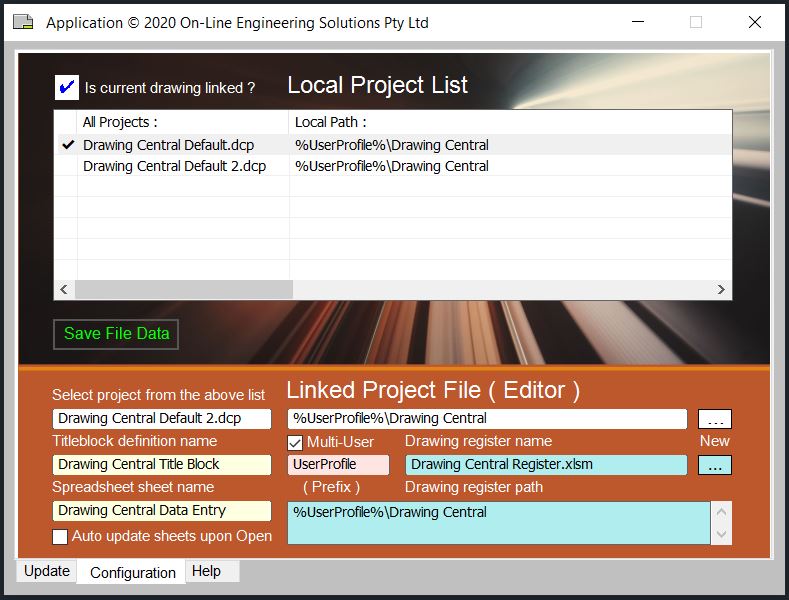
A properly configured drawing will have the name and path of the project file stored as a "link," exactly as shown in the Local Project List. That is where Drawing Central looks to find your configuration. It contains all the specific project data and needs to be saved in a "central" place for all users to find. This allows a single project file to be used consistently across all the office workstations and supported CAD programs. The Editor makes it easy for you to manage your list of projects, or create new ones, on the fly.
This is very similar to other CAD project file systems. The local user can build up a list of the most used configurations for reference or to quickly "link" the current drawing to a project file. It is text-based and may or may not have project files associated with them, as, over time, directories will get moved and files deleted.
If the current drawing is linked to one of the projects, its listing (left column) will be prefixed with a tick.
This section shows all the data associated with the currently selected project "file." This is key to creating such customizations, allowing Drawing Central to be used in a variety of drafting disciplines and projects.
It can also be used as an editor to create or change ".dcp" (Drawing Central Project) configuration files. You can select a project from the above list to use as a template. Just change the name and data as required, then use the Save Project button to create your new project file.
The note in the top left-hand corner of the dialog box indicates whether the current drawing is "linked" or not.
When you hover the mouse over the Project List, press the Right-Hand Button for the command menu. There you will find six commands divided into two main areas.
ADD... As it suggests, this is where you go when you want to add a configuration to the list. The sub-dialog box allows entry of an existing file or the creation of a new name and path. Use this option when there are no suitable templates in your Local Project List. No file will be created, just a text pointer to your configuration. If no file exists, you will need to create one later on. Also, if you are looking for files in a hidden or system directory, you may need to select the Project Path first. This will allow you to continue your search with that path as a starting point.
DELETE... This deletes the selected project entry from the list. It also gives you the option to delete the file or not. Other project users and drawings may still require this file, so extreme care may be required. If you delete all the entries in the list, when you next load the dialog box, a new "default" entry will appear.
LOAD... This will load the selected project's Drawing Register. This is very handy for reviewing the Drawing Registers of other projects.
LINK... This will save the currently selected local project to the current drawing. Now, when the drawing next loads, it will remember the correct project name, path, and configuration. This allows the automatic selection of the associated Drawing Register and Updating of all drawing sheets.
SAVE... This will save the current drawing's "link" to the list. It is a way to copy configurations from another project.
REMOVE... This only removes the above "link" from the drawing file and leaves the Project List and File Data intact. The Link Indicator will be replaced with a red cross. This means the current drawing's memory of which project to auto-load is lost. If you wish to keep these changes, you will need to save the drawing. You can also use Windows Explorer to move or delete redundant ".dcp" files. Back to Top
This option has been included to allow all team members to have a recognizable path to the Drawing Register, even over a "cloud"-based directory structure. The file path prefix is replaced with one applicable to you, the computer user or login. The rest of the path is considered common to all team members and, when combined, points to the same relative project location. For example:
prefix %UserProfile% (= "C:\Users\You") combines with "\OneDrive\Company Name\Project\Drawings\..."
prefix %OneDrive% (= "C:\Users\You\OneDrive") combines with "\Company Name\Project\Drawings\..."
This means you are working off local files and not the online versions. Therefore, Excel and your Drive will be looking after the syncing issues, as well as the saving and merging of your Drawing Register with other users. If you are using BIM 360 (or similar), you may need to "check out" the file first before you can make any changes to the drawing register or configuration files. Otherwise, these are fine to be loaded and used as "read-only".
You or your IT department may want to try other Windows "system environment variables" to suit a particular project setup. Remember you need to untick the option box to edit the default text "UserProfile".
You must enter suitable paths for both the configuration and drawing register files. An incorrect prefix will give you an error message. Once both paths are correctly entered, you can tick the option and lock the prefix text.
Any changes to the Multi-User option will bring up two message boxes. The first shows the current value of your parameter. Next is a reminder for you to consider the consequences of any changes for other team members.
This option allows the automatic updating of drawings as they are loaded and then reports any changes. It has been designed to be as silent-running as possible by stopping error messages and only making changes as required. Even so, you may notice a small increase in drawing load times.
As well as this document, you can also go to the HELP tab to troubleshoot a range of problems. Hovering over the Drawing Central menu Icon and pressing F1 will bring up even more information specific to the currently installed version.
Say you want to check a particular configuration to make sure it is suitable for "linking" to the current drawing. If you have the project listing highlighted in the configuration page, you can then go over to the HELP tab and review an error check done on it. The severity of any errors is explained below.
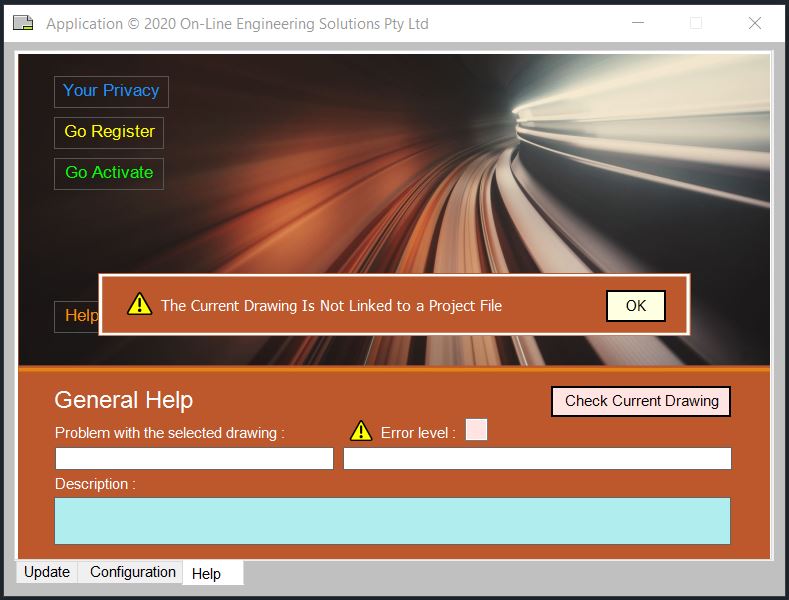
You could also click the "check current drawing" button for the current drawing link and configuration to be checked.
The errors rank from level 0 for "no errors" up to 8 for "the most critical errors".
0 = "Cannot find any Errors with the selected Configuration Data" - You are ready to proceed. The Change Notice will report any other issues after the Update.
1 = "Cannot find the Current Drawing Number in the Drawing Register!" - This error is noted as "Drawing is Not Recognized" during Change Notice reporting.
2 = "Cannot find the Current Sheet Name in the Drawing Register!" - The Drawing Register is found, but does not contain a Sheet called "Spreadsheet Sheet Name".
3 = "The Drawing Register has been opened by another User!" - You are locked out until the other User closes the Drawing Register. Give time to Synchronize.
4 = "Cannot find the Drawing Register File as per Configuration!" - The Drawing Register File is not in the Directory associated with "Drawing Register Path".
5 = "Cannot find the Title Block Definition as per Configuration!" - The Current Drawing does not have a version of Title Block called "Title Block Definition Name".
6 = "Cannot find the Project Data File as per Configuration!" - The configuration "Linked Project File" cannot be found in the list of Local Paths or Directories.
7 = "This Drawing has not been Linked to any Project Data File!" - To continue, you need to load an existing "Project" file or create a completely new configuration.
8 = "No Valid License Found!" - Defaulting to "demonstration mode" as the registration data is invalid or has timed out. Back to Top
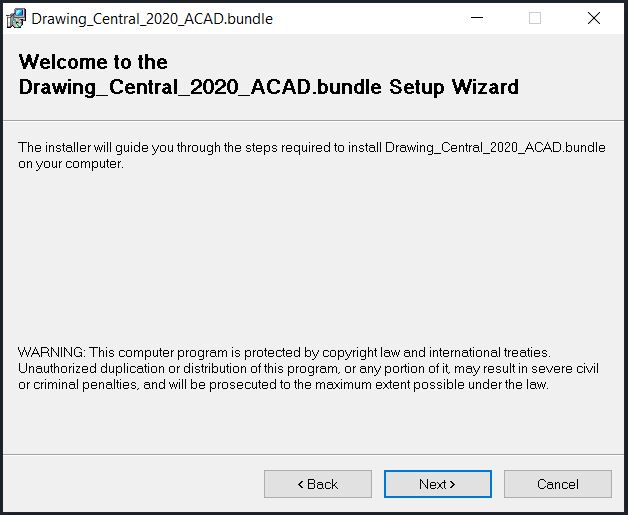
Generally, this App should be installed as per the App Store's instructions. Drawing Central provides installation files for each CAD program to automate the process. Some CAD programs need to be re-loaded before an Application will be accepted.
Inventor can block the add-in for security reasons. If so, go to 'Tools' then 'Add-Ins' and find 'Drawing Central 2024' under 'Applications', highlight and unblock it. Then tick 'Load Automatically' and reboot the Inventor program.
If AutoCAD users are having problems with the button or icon loading, then try using the "cuiload" command and load the partial customization file: "C:\ProgramData\Autodesk\ApplicationPlugins\Drawing Central for Autodesk® AutoCAD®.bundle\Contents\Resources\AutoCAD_Central.cuix". The button will then start appearing in the "Add-Ins" tab.
If you wish to uninstall, then go to Windows / Control Panel / Uninstall a program. The removal of Drawing Central will have no consequences for any drawings or drawing registers created during that installed period. They are completely standard and yours to open as normal. You can always re-install the next time a big drawing issue is coming up.

After installing Drawing Central, you will need to initialize the registration process by selecting the "Help" tab and then by clicking the "GO Activate" button. Click "Yes" to "Check your current Registration Data?" and process your new license. First-time users can enjoy a 30-day free trial period, which includes working example files relevant to the current installation. This trial period is applicable to all CAD versions and gives you ample time to explore Drawing Central's many features and evaluate its potential to improve CAD productivity.
Once the registration period expires, Drawing Central enters "demonstration mode." In this mode, you can view drawing registers and configurations, but you are unable to save any changes made. To avoid this limitation, click on the "Help" tab and then the "GO Register" button to create a new registration or "GO Activate" to check your current status.
By clicking "Go Register," users will be redirected to Drawing Central's secure website, where they can search for active or complimentary registrations by referring to the License Check panel. It is important to complete all the required Registration Data fields, with special attention given to the email address as it is the only means of contact for user support.
The Payment System panel provides you with the option to choose between a Single or Multi CAD License. The Single License is FREE, but it only works with the current CAD version and can only be used once per machine. Thus, users should apply it to their preferred CAD program. The Multi License, available for a small fee, can be used with all installed CAD versions (currently three, with more planned) and is suitable for projects using multi-disciplined CAD software that require the same centralized drawing register.
Finally, the fee calculator allows you to check the effects of adding 30-day modules to your registration period. Select the desired number you require and the cost (if any), expiry date, and total number of days will be adjusted to suit your choice of license and include any active registration if applicable.
You can proceed by clicking on either the "Apply for FREE License Here" or the "Buy Now" button. An email will then be sent to your support email address and contain all your registration details and include a manual data entry procedure if required. You must now activate the license as below.
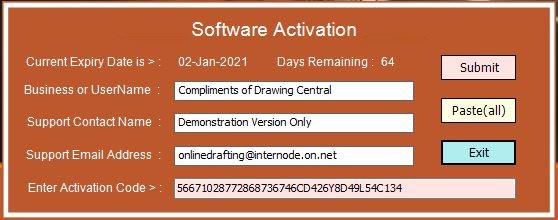
After completing the registration process, you will need to click the "GO Activate" button to implement your new license. Click "Yes" to proceed with the license check and registration or "No" to bypass that process and go directly to the summary page (pictured right).
You can use this page to review your registration and allow for manual data entry if required.
If your license check was successful, then Exit and you are fully operational and ready to "Go ... Update".
Registered users can contact support@drawingcentral.com.au for more help. Back to Top
© 2024 On-Line Engineering Solutions Pty Ltd